Photo mosaics with Rust
10 August, 2019
When I was a kid I remember seeing a poster of Yoda from Star Wars which was made up from various screenshots from the movie. I remember being facinated how several tiny images could be arranged to create a larger image and that how the colour of each small image contributed to the larger picture overall.
The idea of arranging small coloured tiles to create images has been around since 300 BC and artwork created in such a way is called a Mosaic which Wikipedia describes as:
a piece of art or image made from the assembling of small pieces of colored glass, stone, or other materials.
While the technique of arranging coloured tiles to form an image has been around for hundreds of years, photo mosaics are a relatively new take on the art style.
Photo mosaics
The first mainstream use of a photo mosaic I recall was on one of the official posters for the 1998 film staring Jim Carrey, The Truman Show.

You can see in the following close-up of the poster, specifically Jim Carrey's right eye, the image is made up of various scenes from the film. Interestingly each tile is tinted rather than solely relying on the actual colour in the frame. It's a forgivable workaround considering there probably isn't that many fleshy-beige coloured scenes in the movie to sample from.

Writing a photo-mosaic generator
As I've been learning the Rust programming language lately I thought creating a photo-mosaic generator could be a fun project. Rust is a relatively new systems programming language akin to C/C++ in terms of performance. What makes Rust unique is the way it manages memory compared to other low-level languages.
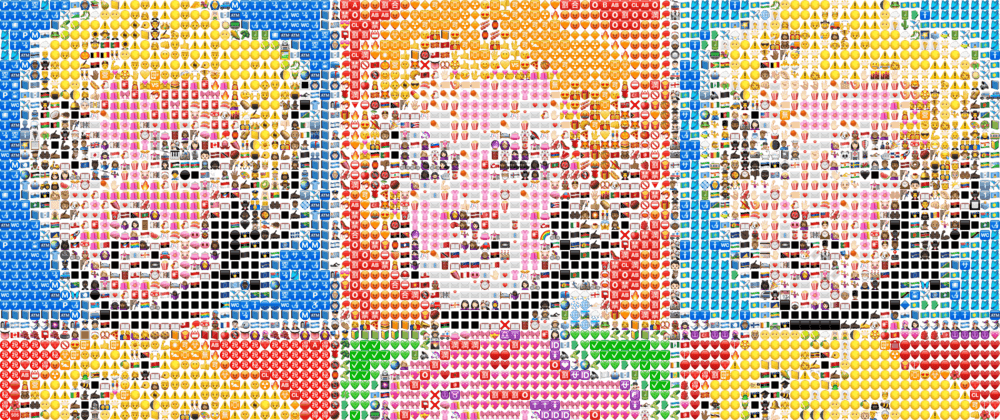
I knew a generator like this would require a large set of tile images to sample from. The original plan was for it to only create mosaics from emoji which is how it got it's name emosaic (emoji + mosaic = emosaic) but as I progressed it made more sense to keep in generic and let the user provide their own pool of tile images.
Similar to my previous (and first) Rust project swirlr, I used dependencies from crates.io, Rust's equivalent to NPM for Node.js. The main libraries I used are image, for loading and manipulating images and sampling pixels, and clap a command line argument parser.
Emosaic works by taking a directory of images used as tiles and a source image.
The output file will be saved to the current directory as output.png though a custom output path can be provided via the -o option. Output is always in PNG format.
The app works by first reading all images in the tiles directory. Each image's pixels are looped over to find the average colour of each image. I found it necessary to exclude any tiles where more than 50% of it's pixels are completely transparent as these didn't look good in the final output. The image's path and average colour is then added to a Tile struct. Each Tile struct was then added to a TileSet struct which represented all available tiles to choose from in the next step.
Next the source image is loaded and for each pixel in the source image we call the TileSet's closest_tile(&self, rgba: Rgba<u8>) -> Tile method. This method works by naively looping over each tile and comparing the distance between colours. We say "distance" as we calculate how close one colour is to another by treating each as a point in 3D space RGB -> XYZ (alpha is ignored). The resulting Tile is then added to a Map keyed by the pixel colour that way subsequent lookups can simply check if the Tile for a given colour has already been found, this is a particularly useful optimization as lossy formats like JPEG will repeat colours often.
Once the tile is found it's copied to the same row/column coordinates in the output image factoring in the desired tile size. The tile size can be configured as the optional command line option -t which defaults to 16. For example a 100x100 source image yields an output image of 1600x1600 (100 x 16 = 1600) so it's important the source image is small.
Further improvements
I'm pretty happy with how this turned out and it's super fast thanks to the low-level nature of Rust. For example, the Marilyn Monroe image above is generated from a directory of 2625 tiles, each with dimensions of 64x64 and a source image with dimensions of 100x100. The command completes in about 2.9 seconds on a 2017 Macbook Pro.

Some further optimisations could be made such as caching the TileSet to disk that way the program doesn't need to read potentially thousands of tile images every time the app is run. Also at the time of writing it does not provide an option to 'tint' the output image like the Truman Show example above.
Overall I'm really liking Rust. It has a very steep learning curve but it's rewarding once the borrow checker stops complaining. It's nice to feel confident that if the app compiles it will run safely. I find small projects like this are a great way to get familiar with a new programming language.
Feel free to checkout the complete source code for emosaic on github.