Command-line image editing with ImageMagick
12 January, 2020
There has been many times during my career as a developer where I've received images from a designer which are not-quite-right in some way. Perhaps a designer has provided an image 1 pixel too wide or in the wrong format. Worse still a designer may have supplied multiple images which are close but not-quite to the specifications you require. Asking the designer to resupply the images can often lead to a lot of back-and-forth between dev and design which is an arduous process that can slow productivity on both ends. Depending on how wrong the images are it can be quicker to simply make the edits yourself however in my experience developers often don't have access to image editing software like Photoshop.
Luckily there is an alternative in ImageMagick, an open source suite of utilities for manipulating images via the command-line. ImageMagick, created in 1987 by John Cristy, is unlike Photoshop in that it does not come will a graphical user interface (though under Unix-like operating systems it's display command can display images in a window). It supports over 200 file formats and is available for download on Linux, Windows, Mac OSX, Android, iOS and more.
The convert command
The main work-horse of ImagicMagicK is the convert command which can be used for various image manipulation task such as resizing, bluring, cropping and more.
Change file type
One of the simplest things you can do with ImageMagick is change the file type of an image. Doing so is as simple as providing an input file and specifying an output filename and extension.
Resizing images
A common action you may find yourself doing is resizing images. Thankfully ImageMagick makes this simple with the -resize operator and supplying the desired geometry.
Operations performed by ImageMagick often take geometry to describe the desired output dimensions of the resulting image. Generally you will provide geometry as either an explicit width and/or height or as a percentage. For example 100, 100x100 and 50% are all valid. Different commands will parse the geometry in different ways so it's always a good idea to check the documentation.
The example above resizes the input image to dimensions 128x128 and saves it to a file named output.png. It's important to note that this preserves the aspect ratio. For example if input.png has dimensions of 256x128 then output.png would be 128x64 not 128x128!
Geometry qualifiers
To ignore the aspect ratio when resizing use the ! qualifier.
Some Unix shells treat characters such as ! are special characters and therefore need to be escaped with a backslash. Alternatively, wrapping geometry in quotation marks saves you having to remember which characters need to be escaped.
Another important flag is the > flag which restricts resizing to only images larger than the requested dimensions.
Similarly there is the < flag which is the inverse of the above which restricts resizing to only images smaller than the requested dimensions. This flag is not very commonly used as you often don't want to upscale as it may result in a blurry image.
The identify command
When manipulating images via the command-line you will need a way of inpecting attributes of an image such as it's dimensions. To do so use the identify command.
This outputs useful information about an image such as it's file type, size and dimensions.
To get even more information try providing the -verbose option.
Cropping images
Cropping an image can be achieved with the aptly named -crop option which like the -resize option takes geometry to describe the desired output dimensions. By default the cropping origin is the top-left of the source image but can be changed by specifying the offset as part of the geometry.
This performs a 100x100 crop of the input image 10 pixels from the left edge and 10 pixels from the top edge.
If the geometry does not contain an offset the image will be cropped into multiple images matching the width and height you provide. Be sure to include +0+0 explictly to avoid this behaviour.
The +repage option is used to discard the virtual canvas information from the output. If you omit +repage and then crop the output you will likely get unexpected results as the crop offset is relative to the virutal canvas. You may find that a little hard to wrap your head around and it's beyond the scope of this article but the take away is always use "+repage" after any 'crop' like operation unless you actually need to preserve that info.
To change the crop origin from the top-left of the image you can use the -gravity option.
Setting gravity to Center as shown above positions the center point of your crop region to the center point of the source image. A neat trick for visualising your crop is to provide the -flatten and -background options.
It's important to note gravity can also affect the direction of the crop. In the following example we set gravity to SouthWest (the bottom left corner of the input image) which changes the Y direction from top-down to bottom-up. Let's move the crop up by 90 pixels.

Again, you can visualise this by adding the -flatten and -background options.
To see all possible gravity options run convert -list gravity.
Shaving images
In addition to the -crop option there's also -shave which can be used to remove pixels from both horizontal edges and/or both vertical edges. Unlike geometry we've seen previously the dimensions we provide to the shave option specify how many pixels to remove from each edge.
Here we are removing 100 pixels from the left edge, 100 pixels from the right edge, 50 pixels from the top edge and 50 pixels from the bottom edge. For example if input.png was 500x500, output.png would be 300x400.
As you can see ImageMagick provides a surprisingly powerful suite of tools of manipulating images from a command-line. While it's a great tool to use on an adhoc basis it's usefulness shines when used for server-side image processing such as automatically scaling or cropping images as they are uploaded or dynamically as images are requested. This article just covers the basics but know that more advanced usage includes combining multiple images together into an animated gif, compositing images by layering, transparency trimming, liquid rescaling and much more.
Check out imagemagick.org for the complete documentation and download links.
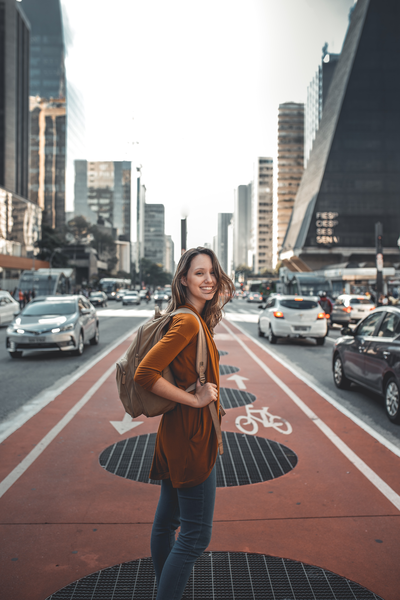
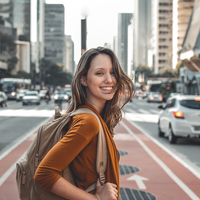
Hero image by Shabu Anower on Unsplash. Photo of girl by Guilherme Stecanella on Unsplash.